Mystic Wire Part 2

 While I still was without my needle tool, I considered ways to pull the wire through the already formed part of the knot with minimal distortion. One method was to deconstruct the knot as it were, consider the parts that form the structural body of the knot and “cut” the ears, leaving the ends free to form decorative spirals.
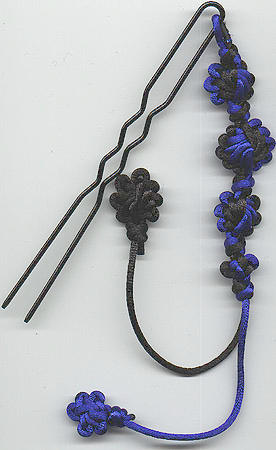
Also, since getting the wire to pass over and under wire already in place was what caused the distortion, I preformed the wire into hairpin shapes similar to the actual hairpin in the picture to the right if less elongated. After cutting and forming 12 hairpins, all that was left was to assemble my puzzle pieces and curl the ends so that they would not slip back out. Again I used a tied knot as a template, but in hindsight… I was going to say that a piece of cardboard or folded paper would do just as well, but you’d have to dissolve or burn out the paper… some sticks (chopsticks, shish kebob skewers, pencils, etc.) elastic banded together to form a square would certainly do the trick. In any case, if/when I do this variant again, I would make smaller hairpin shapes for a tighter body and probably construct a better jig for more precise hairpin shapes.
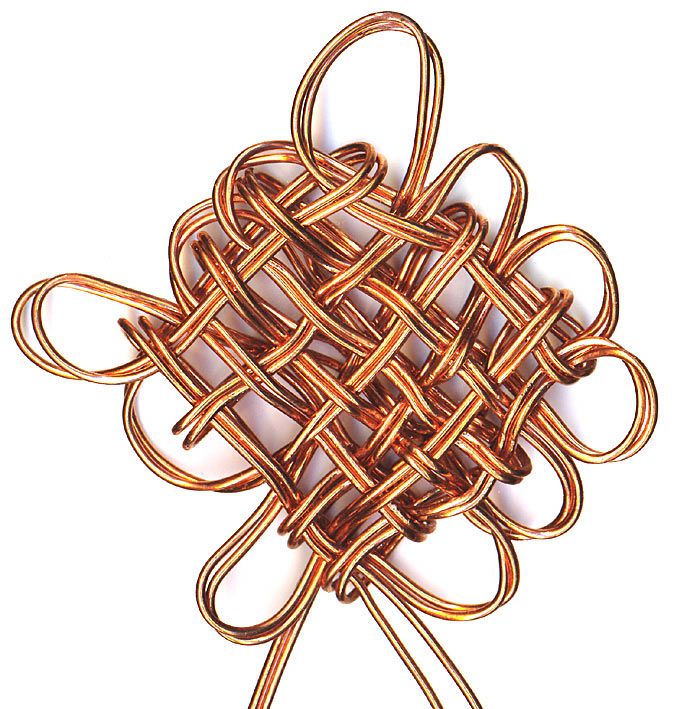 Another thought was to use the cord of the template knot itself to pull the wire through the structure, but how to join cord to wire with minimal bulk? If the wire were doubled, the loop end of the wire could be easily joined to the cord. Doubling the wire allowed a smaller (higher gauge) and more flexible wire to be used. So just pick an end of the cord that you’ve tied the template knot with, and thread it through the loop end of the wire. I then guided the cord end back through the tied knot and when a pass across the structure was complete, I pulled the length of the wire through. At this point the ear would need to be formed or the structural loop firmly folded. Towards the end, pliers were still needed to coax the wire loop end over and under, but the amount of force needed and thus distortion caused was quite minimal.
The biggest problems were caused by the immediately previous loop or ear being warped by the forces of the next pass through the structure. As the wire was approaching it’s next fold point it would sometimes, instead of folding where expected, reshape the previous fold point instead. Knowing that this would sometimes happen and supporting the immediately previous bend while at the same time applying enough force to pull the wire through the structure was a tricky act of manual dexterity. The most warping was caused by the temptation to treat the wire like cord when you’re done tying the knot, because with cord you pull on the ears to tighten the structure of the knot, take up slack or generally reshape things just a little, just a little fine tuning, a little squaring up…
In retrospect, since wire knots most likely are not dense structurally, you could probably use a wrapped loop and tie your knot with this method with a single versus doubled wire element. Putting a glob of glue on the wrap to help streamline the shape might make for smoother tying. Another fun thing to try would be to use a bundle of 4 or even more finer wires and twist them as you go (beforehand better?) to give the appearance of cord.