Finishing Tips: 2009 Valentine Project

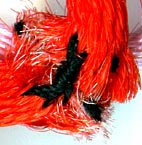
 What I’ve done here is taken the cut end of the 3mm red satin cord and butted them together and sewn them with a black thread. If I had wanted the join to be more invisible, I should have (1) used red thread and (2) either lightly heat sealed the ends or treated them with Fray Check
 or similar product.
If you’re going to heat seal the ends, you could go whole hog and just heat seal the ends together directly. It’s up to you and how you feel about fire and/or the unpleasant smelling fumes. That said, if you are slow and careful with the application of fire (in a well ventilated area), the fumes are minimal and the results very neat and tidy.
For your benefit, however (it had nothing to do with black already being threaded on the needle, or knowing that the join would be fairly completely hidden 8), I used a high-contrast thread to execute the join. As I had not treated the ends in any way, I worked approximately 2mm or so away from the cut ends (so as to not be accelerating the fraying process) and simply sewed them together. I also tied a great big standard sewing tie off knot to finish where more subtle satin cord specific techniques are possible (but not necessary in this case).
 Once done, move the join towards the main body of the knot and under some crossing cords. Work the new slack through the knot and you’re done.
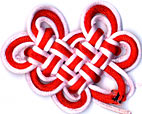
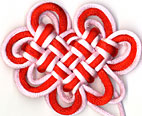
You might notice that the one set of outlining ears, where we just joined ends together, are mis-aligned relative to the main cord. This is not an error as such, it is the natural alignment of the outlining cord if you just follow it around from one side to the other preventing crossing. If this were a project that I wanted a more professional finish to, I would have crossed sides under a cord crossing at some point.